Unix Bootcamp
While you are probably quite comfortable using your own Mac or Windows machine, much of the work you will need to do as a student in the CS department will involve the use of machines running Unix or Linux.
Since that is an environment that is likely to be far less familiar to most students, this collection of resources is meant to get you up to speed with the essentials as quickly as possible. There's always more to learn over time, but this should be sufficient to get you started.
A PDF handout that summarizes most of the material covered in these videos is available for download.

1 Intro
Video: ~25 minutes
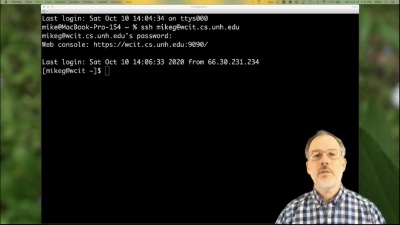
This video introduces some basic concepts and terminology that are necessary to understand Unix. It explains the concept of an operating system, the relationship between Unix and Linux, the kernel, the shell, processes, files, programs, command line interfaces, terminal emulators, and credentials. It also demonstrates how to use ssh to connect to the wcit.cs.unh.edu computer.
2 Understanding the File System
Video: ~34 minutes
This video is focused on understanding the concepts that underlie the file system. It covers files, directories, directory trees, filenames, paths, pathnames, extensions, quotas, commands, command lines, flags, and hidden files. It also introduces the clear, pwd, quota, and ls commands.
3 Moving Around
Video: ~16 minutes
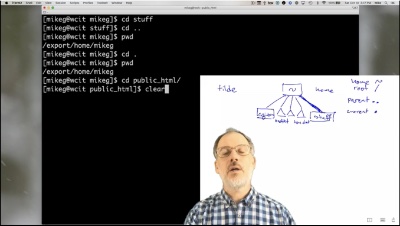
This video explains how to move around effectively within the Unix filesystem. It covers shell features such as autocompletion and the command history, goes deeper into directory trees, and introduces the cd command (and associated shortcuts) for navigating within them.
4 Working with Files
Video: ~30 minutes
This video explains how to manipulate files and directories. It introduces the mkdir, mv, cp, rm, rmdir, cat, and less commands.
5 Additional Tools
Video: ~32 minutes
This video explains redirection, piping, and the use of pattern matching in Unix command lines and the online manual.
6 Permissions
Video: ~30 minutes
This video explains the Unix file permissions system. It introduces the chmod command. Note that the last five minutes of this video may make more sense to you after you complete the Numbers for Computing videos.
7 Using scp
Video: ~17 minutes
This video explains how to use the scp command to move files and directories between network-connected systems.
Setting up your own Linux environment
While you do have access to one or more systems (such as agate.cs.unh.edu) on which you can experiment with the Unix commands discussed in the videos above, sometimes you may find it useful to have your own local Linux system on which to practice. There are many different ways one might accomplish this, but the resources below should help get you pointed in the right direction.
- MacOS
-
The MacOS shares a common lineage with Linux, so it supports most Unix-style commands at its command line. To access the command line (aka shell) under MacOS, simply open a terminal.
A basic Terminal app is part of the MacOS standard software. Look in the Other folder within your Mac’s Applications folder (or Launchpad).
If you want something a bit fancier, you might give iTerm2 a try.
It’s also worth noting that many programmer’s editors (such as VS Code) provide integrated terminals.
- Windows Subsystem for Linux (WSL)
-
WSL is a optional extension that allows you to run a Linux environment directly within your Windows environment. If it meets your needs, it’s the simplest way to get access to Linux commands on a Windows machine.
You will find everything you need (including download and installation guidance) via the WSL documentation.
- A virtual machine (VM)
-
If you need a full-featured Linux system, neither of the options above is likely to suit your requirements. In this case, the next simplest solution is likely going to be running a complete Linux system within your existing system as a virtual machine.
A virtual machine requires host software that, when run, enables your computer (Mac or Windows) to “pretend” to be a separate (virtual) computer.
When this virtual machine is configured and running, you can install any operating system that it supports and access that operating system through a Mac or Windows window just as you would any other application.
There are various forms of host software available, but probably the best place to start is with Virtual Box, which is available for both Mac and Windows.
Of course, the host software only gives the virtual machine on which to run your intended operating system. Once you have the host software installed, you’ll also need to install and configure your desired Linux distribution onto that virtual machine.
Again, there are many Linux distributions from which to choose, but a good place to start would be with Ubuntu (stick with the basic installation, you probably don’t need Ubuntu Pro).
One great advantage of using this approach is that you use your host software to install and try several different Linux distributions side-by-side, decide which one best suits your needs, and simply delete the unused VMs when you decide not to use them any longer.
- A dual-boot system
-
If, for some reason, you expect that you will be spending significant amounts of time using only your Linux environment and/or need as much performance as you can squeeze out of your hardware (and you have a Windows system), you might consider configuring your system with a dual-boot option.
When your system is properly configured to dual-boot, you get to choose whether it runs Windows or Linux each time it restarts (or boots). This is far less convenient than running a VM (which runs like any other application besides your currently running applications), and it’s generally not an option for Mac users. But, under this arrangement, your computer is entirely dedicated to running Linux or running Windows, not trying to run both simultaneously. The downside is that switching between the two operating systems requires your to completely restart your computer.
Another downside to this approach is that getting it setup on your computer requires some very substantial changes to your storage device (and for that storage device to be allocated in part to one OS and in part to the other, whether you're using all of that allocated part or not). As such, there is a much greater risk of something going wrong with this approach, and it will be much more difficult to reverse the process should you change your mind later.
Because there are such significant risks (and the details can potentially vary widely for each specific situation), I have chosen not to recommend specific sources for further information regarding this solution. If you really wish to pursue it, start with a reliable backup of your entire storage device and carefully research and plan your approach before acting.
- A dedicated system
-
It’s worth mentioning that Linux tends to run much more efficiently than Windows. As such, one possible option would be to see if you have (or can acquire) an older computer that you can dedicate to the role of running Linux for you. Computers that have been set aside as “too old for Windows” may be perfectly sufficient for use running Linux, especially if all you need is a place to experiment and try things out.
Assuming the system is not needed for any other purposes, this approach will allow you to wipe the storage device clean and avoid the potential headaches associated with configuring a dual-boot environment on your primary computer.